Buona seeeraaa ^^
Oggi ho una review di due prodotti inviatimi da KKCenterHk per voi!
Innanzitutto, ecco come si presenta il pacchetto (inviato il 31 maggio e arrivato il 18 giugno da Hong Kong):
ENG
Good niiight ^^
Today I have a review for you, thanks to KKCenterHk!
Here's how the packaging was like (and it had a very quick shipping, less than 20 days from Hong Kong to Italy):
Come vedete, era proprio ben impacchettato!
Ed ecco il primo prodotto (non fate caso al cotton fioc e al bastoncino per cuticole):
As you can see, it was pretty well packed!
Here's the first product (don't bother about the q-tip and the cuticle stick):
Un barattolino con un rotolino foil per unghie della N.Nail e la sua colla (il rotolo misura all'incirca 1.5m x 4cm)!
Ero estremamente curiosa di provare questo tipo di articolo che, per me, è una novità, non avendo mai provato nulla del genere! :)
Il modello della carta è il codice NNAIL-E29 che trovate QUI, dove trovate anche un video che spiega come utilizzare il foil!
Some nail foil transfer (150cm length, 5cm width) by N.Nail and its glue!
I was thrilled, I couldn't wait to try it out :D
The model is E29 and you can find it HERE, where you find a video tutorial too ^^
Per utilizzarlo, innanzitutto, va stesa l'apposita colla sopra una base di smalto (io ho utilizzato una mano di Excalibur) e bisogna aspettare fino a che questa da bianca non sia diventata trasparente.
Allora, dopo aver precedentemente preparato dei pezzetti pre-tagliati dal rotolino, bisogna armarsi di pazienza e applicare con cautela il foil sopra alla colla diventata trasparente (ma non ancora asciutta!) e spingere bene con, ad esempio un cotton fioc o un bastoncino per cuticole (ecco spiegato la presenza dei due nelle immagini!) e staccare, facendo attenzione che il foil abbia aderito alla colla.
Nell'immagine sopra, il primo pezzo a sinistra è messo a testa in giù per mostrarvi la differenza ^^
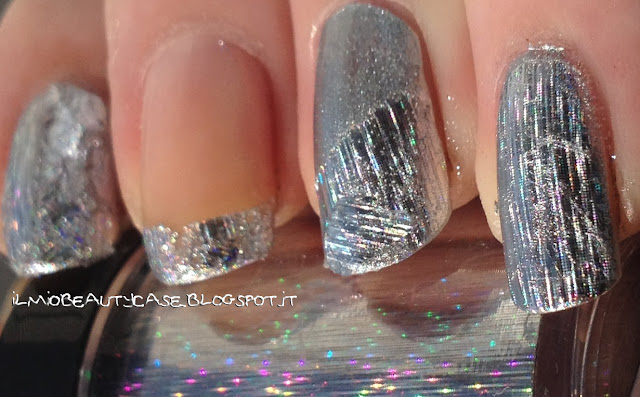
Ed ecco la mia prova:
You will need a coat of nail polish (I used one coat of Excalibur) and after it dried you will need to use a coat of glue. The glue is white but after some time it will be see-through and only then you have to put over it some nail foil transfer (remember to cut it first).
You will now need to gently press it on the nail e.g. with a q-tip or a cuticle stick and then you can remove the foil.
On the previous picture, the foil on the left is upside-down to show the "other face of the foil" haha.
Here's my first attempt:
Sì, in quasi tutte non mi è andata a buon fine al primo tentativo tranne che sul mignolo, sul quale mi è venuto perfetto!
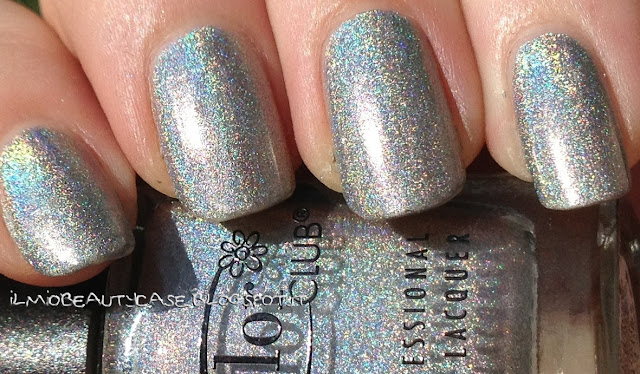
Ecco quindi un doppio dettaglio del mignolo ahah:
Yes, I wasn't able to fit it perfectly on all of the nails except for the little finger nail, so here's a close-up of it just because it was simply perfect LOL:
Sì, io sto iniziando a prenderci mano solo ora ma devo ammettere che non è così difficile come sembra, anzi!
E mi piace proprio, il risultato! :)
Passando al secondo prodotto, ecco cosa vi mostro:
Well, I am practicing with the application and now it's not so hard as it looked once for me! :)
And I love the result! :)
Here's the second product:
Delle stupende farfalline (il righello, ovviamente, è in centimetri, giusto per darvi un'idea!) della Bluesea che trovate QUI, con il codice BLUESEA-FB02A.
Ogni confezione ha due farfalline all'interno.
Io le ho provate sopra una gradient che, ahimé, ho fatto, senza accorgermene, con una spugnetta sporca! Aaarghhh XD
Some beautiful butterflies (the ruler is in cm) by Bluesea that you can find HERE, the item code is BLUESEA-FB02A.
Every pack has two butterflies.
I tried one of them over a gradient (sorry, I forgot the clean up and I used a dirty sponge T-T)!
Attenzione, la farfallina è DAVVERO in 3D, non è uno sticker, ecco due close-up per mostrarvi quanto effettivamente sporge dall'unghia:
Be aware, the butterfly has actually a 3D effect, it is not a sticker, here's a close-up:
Facendo molta attenzione, le farfalline possono essere staccate per poi essere riutilizzate (nel mio caso si è portata via un pezzo di smalto, per cui ho tentato di pulirla utilizzando una goccia di acetone e un cotton fioc).
Insomma, sono entrambi prodotti facili da utilizzare (anche se per il foil ci vuole un po' di pratica e pazienza) e veloci.
Vi ricordo che, sul sito KKCenterHk, che spedisce anche in Italia, potete trovare i foil qui (qui quello mostrato in questo post) e le decorazioni per nail art qui (qui quelle mostrate in questo post).
Infine, sappiate che KKCenterHk offre, oltre che prodotti per unghie (anche smalti), tanti articoli per make up, parrucche, vestiti e accessori e una vasta gamma di ciglia finta.
Beh, vi piacciono le decorazioni per unghie?
Cosa ne pensate dei foil (non come finish ma come effettivamente pellicole)?
If you will be pretty careful, you might detach the butterfly to re-use it (in my trial, it remove some nail polish but I made some clean up with a q-tip and a single drop of acetone and now it is almost perfect).
Well, this products are both pretty much easy (the foil needs a bit of practicing, tho) and very quick to use.
On the KKCenterHk site, it ships worldwide, you can find nail foil transfers here (here the one I just showed you) and nail art decorations here (here the ones I just showed you).
Last but not least, KKCenterHk has a nice amount of fake lashes, besides of make up items and cosmetics, wigs, clothing and accessorizes, besides of nail items (nail polishes too!).
So, do you like nail art decorations?
What do you think about nail foil transfers, have you ever tried them out?
Thank you for reading,
*Ky*
DISCLAIMER:
Questi articoli mi sono stati inviati da KKCenterHK.
Non ho ricevuto alcun compenso per questo post che riflette la mia opinione personale.
DISCLAIMER:
This products were sent to me by KKCenterHK.
I did not receive any compensation for this review that reflects my personal opinion.


